This project came about from a desire to have more labels around the garden. What’s that plant? Is this oregano or marjoram? Is this edible sage or ornamental? Plants that are labelled can also suggest they’re perennials, or at least there more intentionally, than annual flowers or volunteer plants.
Additionally, existing labels were polluting or otherwise limiting. Plastic labels we found, although inexpensive, were pretty short and, after a year or two in the sun’s UV, broke or crumbled. Metal labels, while looking sleek and simple, also had a smaller writing surface and could get upwards of $1 apiece. Using large wooden rounds (~15¢ apiece) and landscape staples (~15¢ apiece) with some uncounted cost of markers & glue was very freeing and inexpensive.
Gardening teachers can also partner with teachers in middle grades looking for art projects. Students can use oil-based paint markers or wax crayons to draw designs for these wooden rounds. Younger grades may need older assistance with writing legible plant names. Older students can contribute to the bending and gluing of rounds to plant stakes.
— Supplies —
(see Notes On Supplies below for more commentary)
3” wooden rounds (via Amazon)
8” landscape staples (via Amazon)
Oil-based paint markers or wax crayons (via Amazon, via Michaels)
General purpose rubber cement (like household Goop, via Amazon)
— Steps —
Draw labels
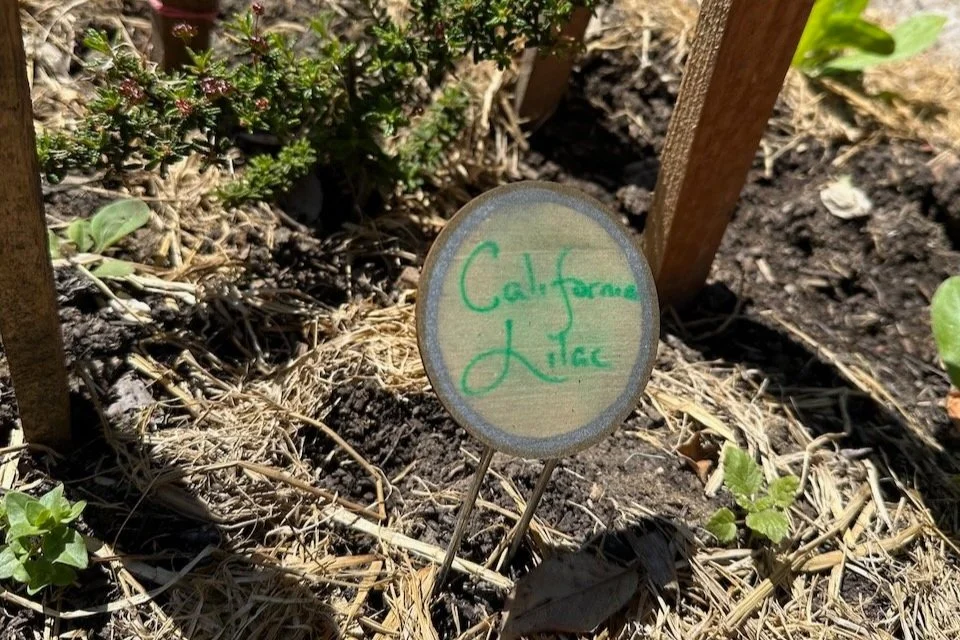
Use paint markers to clearly write the name of plant or whatever other information you want on there. Remember that this will likely be read from several feet away, at standing height. I’ve found that a border around the outside neatly frames the label, especially if you’re not as visually artistic (like me). If you mess up one attempt, you can just flip it over and try again on the backside if you want.
Bend STaples
Use whatever materials you have to bend the staples at about 2” from the closed end (for our 3” rounds), and around a 45° angle. We have a bench vise that we use to clamp at 2” up and then are able to bend cleanly. Use a cloth in the vise to avoid scratching the stakes.
Glue Pieces
Apply cement to the raised face of the staple, then press onto the back of the round so the label faces skyward. Look at the front of the round to make sure it’s straight, and then zhuzh it if needed while the cement is wet. Place upright to dry; I haven’t found a need to clamp it or anything complicated. In the photos below you can see my first painting attempt on the bottom of the round.
— Notes on Supplies —
Rounds. Obviously you can use whichever sized wooden rounds you wish, but for us 3” seemed a good compromise between legibility from afar, and being subtle enough not to stand out too much in the garden. Smaller rounds seem to get lost; larger rounds could encourage more artistic freedom from students, which could also become a distraction. If you have experiences, leave a comment!
The unfinished wooden rounds tend to bleed very slightly along the grain. It hasn’t bothered me as a garden label, but students looking for very fine artistic detail might get annoyed. If you find another product that works better, please leave a comment!
So far the wooden rounds have held up to watering and the sun’s UV. I tried applying a mineral oil “coating” to help protect it from moisture, but it just smudged the oil paints and didn’t help. Years-long clinical trials have started as of this post, will report back. If you have data please comment!
Staples. The 8” landscape staples were 1” wide and 11 gauge galvanized steel, which were the perfect size for the back of our 3” wooden rounds. I think the length is great in my early experience, although there are shorter and longer options. If you have experiences please feel free to comment.
Markers. The oil paint markers were chosen to be weather resistant and more outdoor stable. Sharpie / permanent markers tend to fade from outdoor UV easily. Wax crayons can work for younger children but could also get scratched / rubbed off slightly more easily. We haven’t really experimented with acrylic paint markers or brushes, but if you have, please leave a comment!
Cement. General purpose household cement works fine for this application. Don’t use water-based glues like Elmer's because they will dissolve with garden watering.
Please feel free to leave comments as to what worked well or less well for you!