Makes 6 pizzas about 12” diameter.
Yeast is very bubbly when active.
Mix together to proof the yeast:
1 ½ cup warm water (~110 F)
2 teaspoons dry yeast
2 tablespoons sugar
Mixing herbs, salt, and sugar into flour is easiest.
While the yeast awakens, stir together your flour mix:
4 cups flour (any combination of below)
whole wheat flour for flavor / nutrition
bread flour for chewiness
all purpose for balance
my latest mix: 1 cup whole wheat & 3 cups all purpose
2 teaspoons salt
Herbs & seasoning
ideas: 2 tablespoons dried oregano & 2 tablespoons onion powder
I also add a tablespoon of sugar per cup of whole wheat flour
A paddle attachment is great to start mixing with, before moving to a dough hook.
Pour the active yeast & water mixture into a mixing bowl with a paddle. Mix in:
4 tablespoons olive oil
Set aside for later use:
extra flour
fine cornmeal
Mixing the dough
This dough is just barely sticking to the scraper; if you can work with it, this is a great moisture content.
Now mix in most of the flour mixture at medium speed, about a half cup at a time, changing to a dough hook when the mixer starts chugging. Let the dough hook knead the dough for a few minutes while adding flour small spoonfuls at a time, waiting until it’s well mixed in and the dough starts sticking less to the sides. Depending on measurements and chance, you may have extra flour left over, or you may need more flour. The dough is good when touching it with a finger is very tacky but doesn’t let many strands of dough come off onto your finger. Take the dough ball out of the mixer bowl; add a tablespoon of olive oil to the dirty bowl; place the dough back into the bowl and turn over a couple of times to get oil all over. Cover with plastic or a silicon pad and let rise in a warm place for a couple of hours.
Re-using the same mixing bowl for rising saves on dirty dishes later; I’ve never seen a problem with sticking.
Silicone lids are great items to have around the kitchen.
Forming the dough
I’ve found that weighing the dough is worth the trouble of being able to make the pizzas about the same size, say within 10 grams of what you’re aiming for.
This dough weighs 1030 grams, so 6 pizzas would be about 172 grams each.
Younger helpers are good at chopping dough and forming dough balls.
Weighing is the easiest way to make sure your pizzas are about the same size. Weights +/- 5% are great, this one is over 172 by 5%.
Dough has hopefully about doubled in size after rising. Remove dough into a clean bowl on a tared kitchen scale to get a total dough weight. Then turn onto a cutting board and shove into a rough log for ease of chopping. (Dough should be oily so no flour needed on the cutting board.) Chop into pieces, and trim off and smoosh on to desired weight, depending on what size of pizza you want:
My last batch, say, was about 1030 grams, so divided by 6 is about 172 grams
6 pieces at ~ 180 grams makes a medium size of pizza that seems to fit most pizza stones comfortably
Once you have the dough clumps you want, roll each clump between your hands until a nice ball is formed. Smoosh the ball lightly onto a clean cookie sheet or some kitchen bowls, cover with a moist kitchen towel, and refrigerate until needed.
Everybody loves rolling dough.
A cookie sheet and a damp kitchen towel on top is a fine container for refrigerating.
Rolling the dough
I’ve found using a rolling pin easiest. Be liberal with dusting flour; having a flour shaker in your kitchen is a handy tool. Always lift and turn to make sure it’s not sticking; the dough shouldn’t tear easily.
I’ve found using a rolling pin easiest. Be liberal with dusting flour; having a flour shaker in your kitchen is a handy tool. Always lift and turn to make sure it’s not sticking; the dough shouldn’t tear easily.
I’ve also found that using a rolling pin is the best and easiest method for making flat pizza; perhaps that’s from my apple pie crust background, but I see plenty of upsides and no downsides to this method.
When ready to assemble pizzas, take a dough ball and place on a well-floured cutting board, flouring the dough top slightly as well. Roll out the dough firmly, rotating the dough after each roll to make sure it’s not sticking to the cutting board. Roll until the dough is fairly thin and seems to be large enough (10”-12”); the thinner the dough the more it can tear; but at a good thickness it shouldn’t tear easily, and you should be able to pick it up and move it around without fear. Now transfer to your wooden pizza peal or other pizza-making station, top the pizza, and bake. Eat. Savor.
(Baking pizzas is a large topic with lots of opinions, so won’t go into much detail here.)
Young helpers love rolling dough.
The back of a spoon is great for spreading pizza sauce. Adding topping directly on the wooden pizza peel is easy, but make sure the peel has cornmeal to allow the pizza to roll off into the oven, and make sure no topping or sauce get onto the peel (moisture will make the pizza stick).
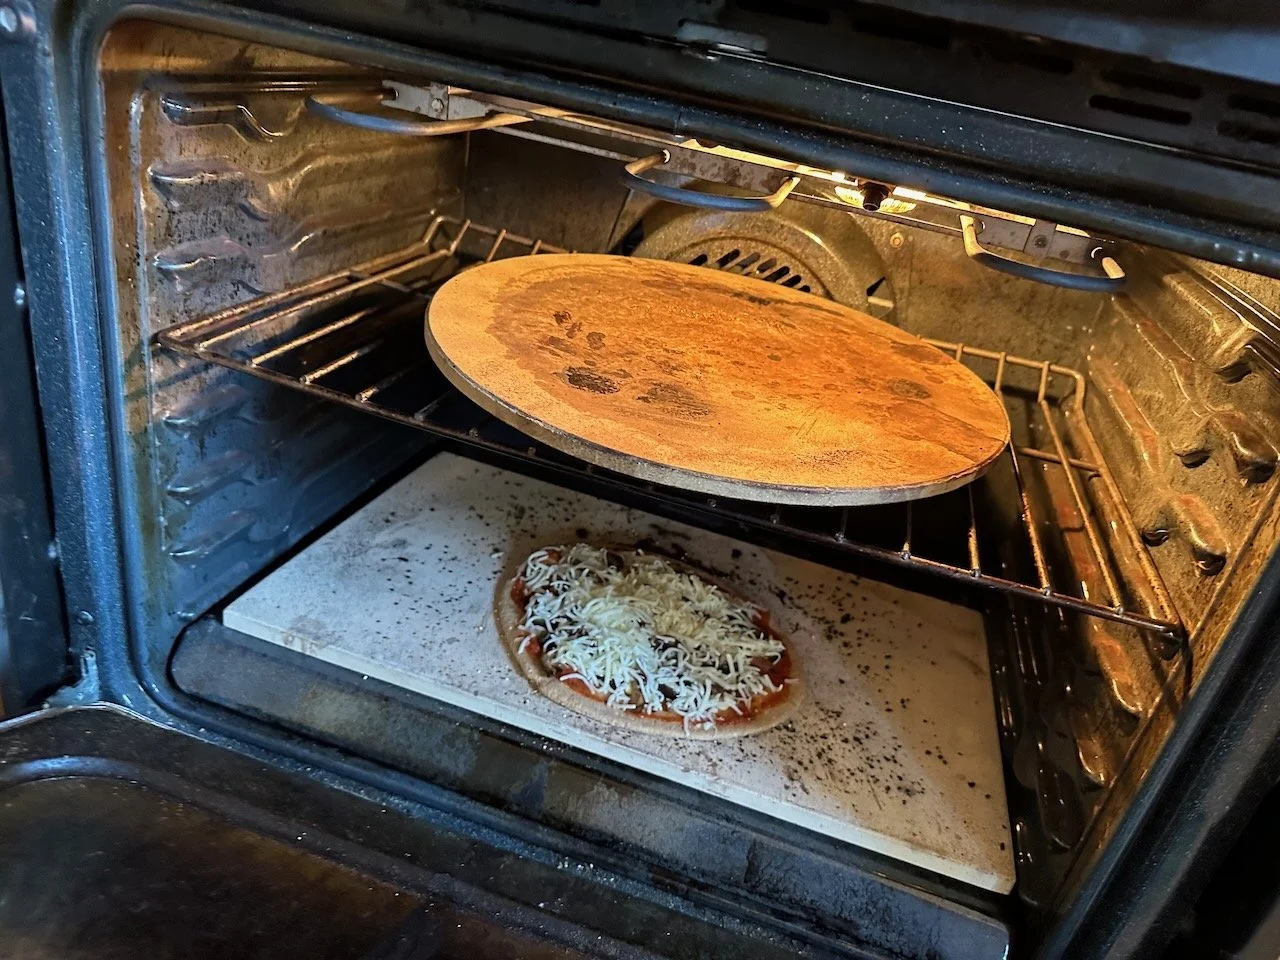
Being familiar with the heat in your oven is immensely helpful. At 500*F our oven radiates a lot from the top, but holds heat at the bottom; so the bottom pizza stone makes a lovely crust, and then halfway through we move to the top pizza stone to brown the toppings. Bonus: we can rotate pizzas in&out of the oven twice as fast.
Moments before being devoured. Letting pizzas fresh out of the oven rest a minute or two before slicing helps set the cheese so it doesn’t ooze, as well as (somewhat) preventing burned tongues from eager mouths.
Resources
• article on pizza dough hydration (this recipe is about 75% hydration)